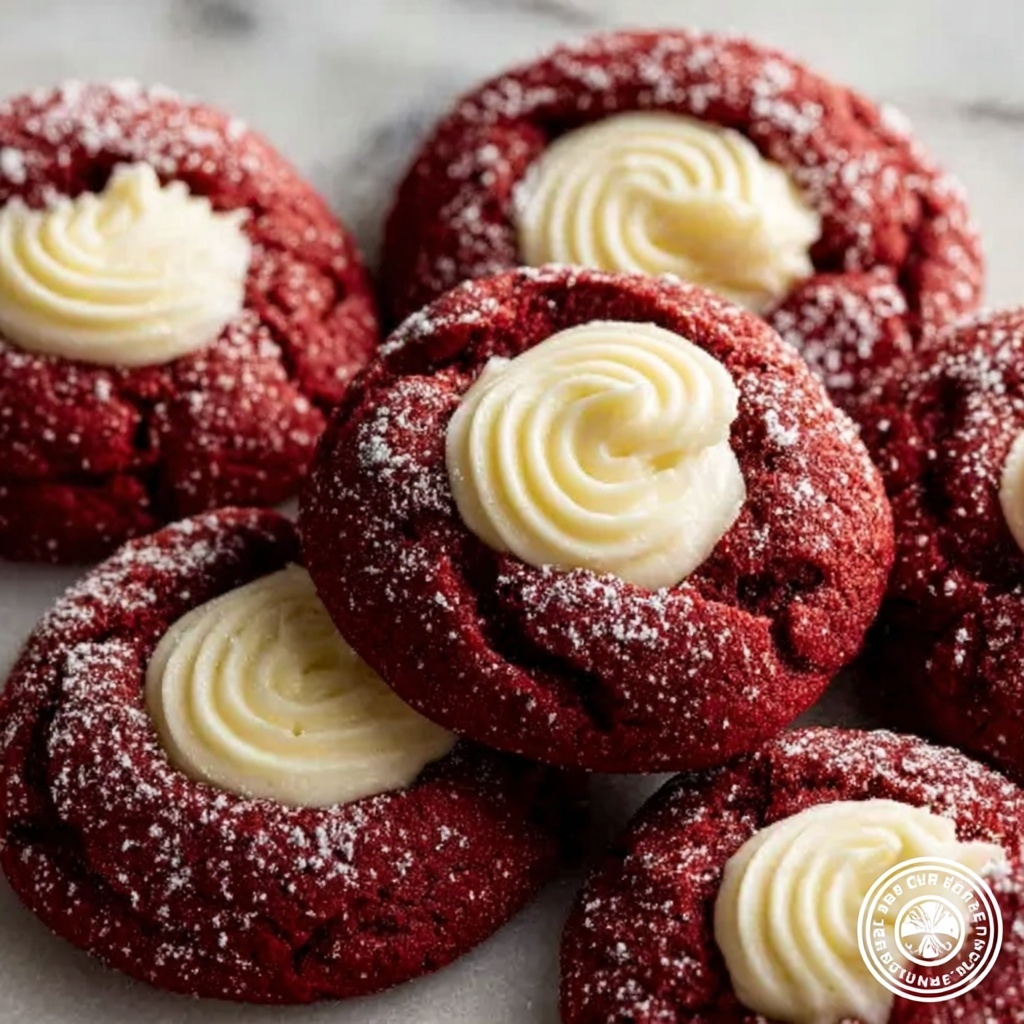
If you’re looking to delight your taste buds with a dessert that perfectly balances rich flavor and irresistible texture, look no further than this Mouthwatering Red Velvet Cream Cheese Thumbprint Cookies Recipe. These charming cookies offer a tender, buttery red velvet base crowned with a luscious, creamy cream cheese filling that melts in your mouth. Each bite brings the perfect combination of moist, velvety dough and sweet, tangy frosting that makes this recipe an instant favorite for gatherings, holidays, or whenever you just need a little indulgence. Trust me, once you try these delightful treats, they’ll quickly become a staple in your baking repertoire.
Ingredients You’ll Need
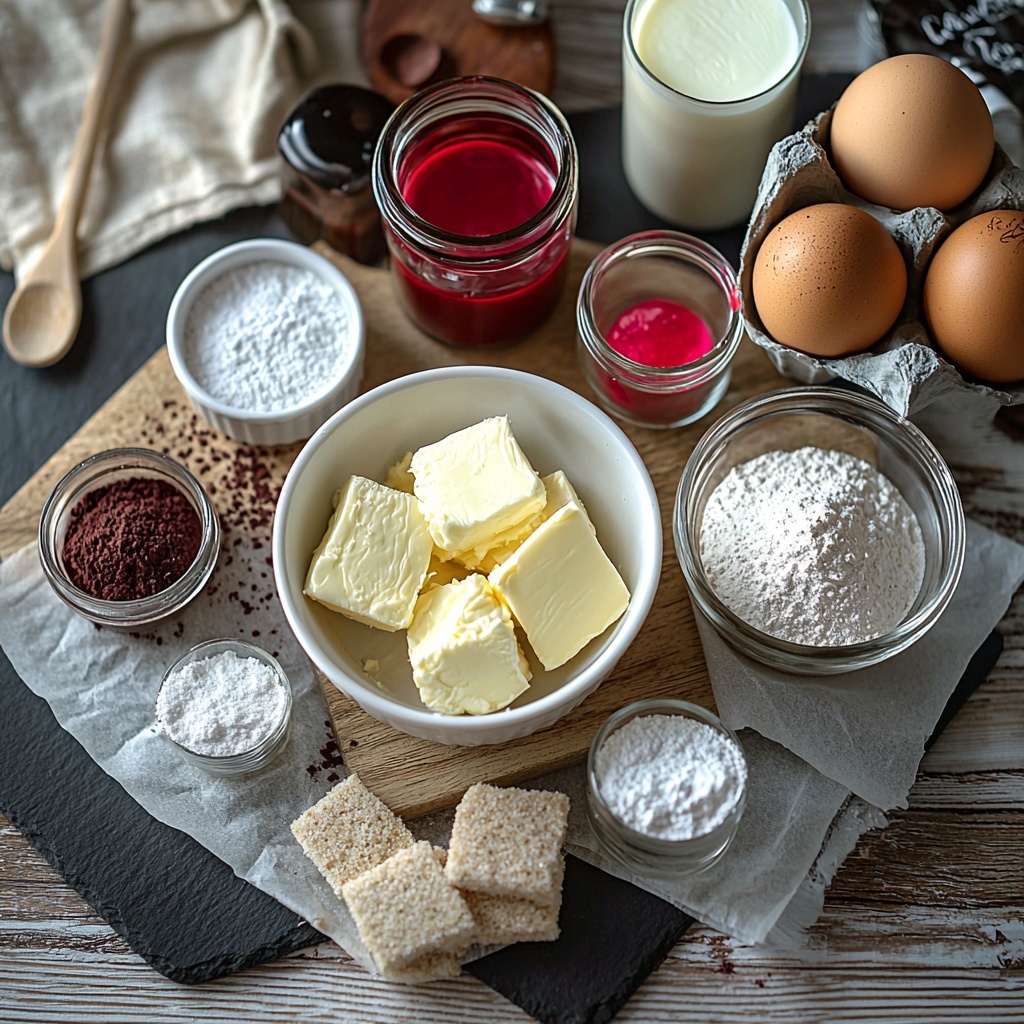
This recipe keeps things wonderfully simple, using everyday ingredients that come together to provide a burst of classic red velvet flavor and the classic tang of cream cheese. Each component plays a key role—from the vibrant red gel food coloring that creates those gorgeous cookies, to the smooth cream cheese filling that makes every bite unforgettable.
- 8 ounces of softened full-fat cream cheese: The star of the filling, it adds rich creaminess and tang.
- 1/2 cup of powdered sugar: Sweetens the cream cheese filling for that perfect balance of flavors.
- 1 tablespoon of softened unsalted butter: Adds silkiness to the filling and helps it pipe smoothly.
- 1/2 teaspoon of pure vanilla extract: Enhances the sweetness and rounds out the flavors.
- 1/2 cup (1 stick) of softened unsalted butter: Creates a tender, soft cookie base with rich buttery flavor.
- 3/4 cup of granulated sugar: Sweetens the cookie dough and helps achieve that perfect texture.
- 1 large egg: Binds the dough and adds moisture for softness.
- 1 teaspoon of pure vanilla extract: Adds warmth and depth to the cookie flavor.
- 1.5-2 teaspoons of red gel food coloring: Gives the cookies their vibrant, eye-catching red velvet hue.
- 1.5 cups of all-purpose flour: The foundation for structure and tenderness in the cookies.
- 2 tablespoons of unsweetened cocoa powder: Adds that subtle chocolate note classic to red velvet treats.
- 1/2 teaspoon of baking soda: Provides just the right rise for light, tender cookies.
- 1/4 teaspoon of salt: Balances sweetness and enhances all the flavors.
- 1/2 cup of buttermilk: Adds acidity and moistness, helping create that signature red velvet softness.
How to Make Mouthwatering Red Velvet Cream Cheese Thumbprint Cookies Recipe
Step 1: Prepare the Cream Cheese Filling
Start by combining cream cheese, powdered sugar, softened butter, and vanilla extract in a medium bowl. Beat this mixture on medium speed until it’s silky smooth and free of lumps. This filling is what makes these cookies so special—its sweet tanginess complements the red velvet cookie perfectly. Once mixed, cover and refrigerate it for at least 30 minutes so it firms up enough to pipe neatly into the cookies later.
Step 2: Preheat and Prep Your Baking Sheets
While the filling chills, preheat your oven to 375°F (190°C). Line two large baking sheets with parchment paper or silicone mats to prevent sticking and make cleanup easy. This setup ensures your cookies bake evenly and release effortlessly.
Step 3: Cream the Butter and Sugar
In a large bowl, beat the softened butter and granulated sugar together until the mixture is light and fluffy, which usually takes about 2 to 3 minutes. This step is crucial because it creates air pockets in the dough that help the cookies stay soft and tender after baking.
Step 4: Add Egg, Vanilla, and Red Coloring
Next, beat in the egg to fully incorporate moisture and binding power. Stir in vanilla extract for warmth, then add your red gel food coloring. The gel coloring gives a rich, vibrant red without affecting the dough’s consistency, making the cookies visually stunning.
Step 5: Mix Dry Ingredients
In a separate medium bowl, whisk together the all-purpose flour, cocoa powder, baking soda, and salt. This dry mix adds flavor and helps the cookies maintain the perfect texture — tender yet structured enough to hold the frosting.
Step 6: Combine Wet and Dry Alternately
With your mixer on low, slowly add the dry ingredients to your wet mixture in increments, alternating with the buttermilk. Start and end with the dry ingredients, mixing just until combined. Overmixing can make cookies tough, so stop as soon as the dough comes together.
Step 7: Chill the Dough
Cover your dough tightly with plastic wrap and chill it for at least 30 minutes. This rest time solidifies the dough, making it easier to handle and helping the cookies keep their shape while baking.
Step 8: Shape the Cookies and Create Indentations
Using a rounded tablespoon, scoop out dough balls and roll them into smooth spheres. Space them about 2 inches apart on your baking sheets. Then, using your thumb or the back of a measuring spoon, gently press a small well into the center of each cookie — this is where your delicious cream cheese filling will go.
Step 9: Bake Until Partially Set
Bake the cookies for 8-10 minutes until the edges are just set but the centers remain soft. Once out of the oven, you may want to press the centers again slightly to ensure a clear indentation for the filling.
Step 10: Fill with Cream Cheese and Finish Baking
Spoon or pipe the chilled cream cheese filling into the indentations on each cookie. Then, pop the cookies back in the oven for another 3-5 minutes, just until the filling puffs up slightly and sets. This double bake step locks in that luscious cream cheese goodness.
Step 11: Cool Before Serving
Finally, let your cookies cool on the baking sheets for about 5 minutes. Carefully transfer them to a wire rack to cool completely. This resting period helps the cookies maintain their delicate texture without crumbling.
How to Serve Mouthwatering Red Velvet Cream Cheese Thumbprint Cookies Recipe
Garnishes
To dress up your cookies, a light dusting of powdered sugar adds a lovely touch of sweetness and visual appeal. For a festive look, sprinkle some finely chopped pecans, white chocolate shavings, or edible glitter over the cream cheese filling once cooled. These simple garnishes can elevate your presentation beautifully.
Side Dishes
While these thumbprint cookies shine on their own, they’re absolutely divine paired with a cold glass of milk, a steaming cup of coffee, or a frothy latte. For an extra cozy treat, serve them alongside a bowl of fresh berries or a scoop of vanilla ice cream to complement their richness.
Creative Ways to Present
These cookies are perfect for gift-giving or party platters. Arrange them on a pretty platter in concentric circles or stack them in a tiered dessert stand to wow your guests. You can also tie them up in cellophane bags tied with a ribbon for thoughtful homemade gifts that everyone will adore.
Make Ahead and Storage
Storing Leftovers
Once fully cooled, store your Mouthwatering Red Velvet Cream Cheese Thumbprint Cookies Recipe in an airtight container. They’ll keep well at room temperature for up to 3 days without losing their delicious texture or flavor.
Freezing
If you want to enjoy these treats later, freeze the cookies (unfilled or filled) in a single layer on a baking sheet until firm, then transfer them to a sealed freezer bag or container. They’ll keep beautifully for up to 3 months. Thaw at room temperature before serving.
Reheating
To refresh chilled or frozen cookies, warm them gently in a preheated oven at 300°F (150°C) for about 5 minutes. This revives that soft texture without melting the cream cheese filling.
FAQs
Can I make these cookies without food coloring?
You can skip the red gel food coloring, but keep in mind that red velvet’s signature appearance comes from it. Without the coloring, the cookies will have more of a subtle cocoa tone but will still taste amazing.
Can I use regular milk instead of buttermilk?
Buttermilk adds acidity that tenderizes the cookies and enhances their classic flavor. If you don’t have buttermilk, try mixing regular milk with a teaspoon of lemon juice or vinegar and let it sit for 5 minutes as a substitute.
How long do these cookies stay fresh?
Stored in an airtight container at room temperature, these cookies stay fresh and soft for about 3 days. For extended freshness, refrigeration is possible but may slightly firm the texture.
Can I make the cream cheese filling ahead of time?
Yes! You can prepare and chill the cream cheese filling up to 2 days in advance. Just keep it covered tightly to prevent it from drying out or absorbing fridge odors.
Is it possible to make these cookies vegan?
Adapting this recipe to vegan needs would require substituting the cream cheese, butter, egg, and buttermilk with plant-based alternatives. While doable, expect some differences in texture and flavor.
Final Thoughts
This Mouthwatering Red Velvet Cream Cheese Thumbprint Cookies Recipe is truly a gem for any baker wanting to impress with minimal fuss and maximum flavor. The irresistible blend of tender red velvet dough with a creamy, tangy filling makes every bite a little celebration. Whether you’re baking for a special occasion or simply craving a delightful homemade treat, these cookies will not disappoint. So roll up your sleeves, gather your ingredients, and get ready to enjoy one of the most rewarding baking experiences ever!
Print
Mouthwatering Red Velvet Cream Cheese Thumbprint Cookies Recipe
- Prep Time: 20 minutes
- Cook Time: 18 minutes
- Total Time: 45 minutes
- Yield: 24 cookies
- Category: Dessert
- Method: Baking
- Cuisine: American
Description
These Mouthwatering Red Velvet Cream Cheese Thumbprint Cookies combine a soft, vibrant red velvet cookie base with a luscious cream cheese filling. The cookies have a perfect balance of cocoa and buttermilk flavors, topped with a smooth, creamy filling that is baked to a slight puff. Ideal for festive occasions or any sweet craving, these cookies are easy to make and irresistibly delicious.
Ingredients
Cream Cheese Filling
- 8 ounces softened full-fat cream cheese
- 1/2 cup powdered sugar
- 1 tablespoon softened unsalted butter
- 1/2 teaspoon pure vanilla extract
Red Velvet Cookie Dough
- 1/2 cup (1 stick) softened unsalted butter
- 3/4 cup granulated sugar
- 1 large egg
- 1 teaspoon pure vanilla extract
- 1.5–2 teaspoons red gel food coloring
- 1.5 cups all-purpose flour
- 2 tablespoons unsweetened cocoa powder
- 1/2 teaspoon baking soda
- 1/4 teaspoon salt
- 1/2 cup buttermilk
Instructions
- Prepare the Cream Cheese Filling: In a medium bowl, combine 8 ounces of softened cream cheese, 1/2 cup powdered sugar, 1 tablespoon softened unsalted butter, and 1/2 teaspoon vanilla extract. Beat on medium speed with an electric mixer until completely smooth and creamy with no lumps. Cover and refrigerate for at least 30 minutes until firm enough to pipe.
- Preheat Oven and Prepare Baking Sheets: Set your oven to 375°F (190°C). Line two large baking sheets with parchment paper or silicone mats to prevent sticking.
- Cream Butter and Sugar: In a large bowl, beat 1/2 cup softened unsalted butter with 3/4 cup granulated sugar on medium speed until the mixture is light and fluffy, about 2 to 3 minutes.
- Add Egg, Vanilla, and Food Coloring: Beat in 1 large egg until fully incorporated. Stir in 1 teaspoon vanilla extract and 1.5 to 2 teaspoons red gel food coloring, mixing until the dough is evenly and vibrantly red.
- Mix Dry Ingredients: Whisk together 1.5 cups all-purpose flour, 2 tablespoons cocoa powder, 1/2 teaspoon baking soda, and 1/4 teaspoon salt in a separate bowl.
- Combine Wet and Dry Ingredients: With mixer on low, gradually add the dry ingredients alternated with 1/2 cup buttermilk, starting and ending with the dry ingredients. Mix until just combined; do not overmix.
- Chill the Dough: Cover the dough with plastic wrap and refrigerate for at least 30 minutes to firm up for easier handling.
- Shape Cookies and Make Indentations: Scoop rounded tablespoons of the chilled dough and roll into smooth balls. Place on prepared baking sheets about 2 inches apart. Using your thumb or the back of a rounded measuring spoon, press an indentation into the center of each dough ball.
- First Bake: Bake the cookies for 8 to 10 minutes until the edges are set but centers remain soft. Remove from the oven and gently re-press indentations if needed to ensure enough space for filling.
- Fill Cookies: Spoon or pipe the chilled cream cheese filling into each indentation evenly.
- Second Bake: Bake the filled cookies for another 3 to 5 minutes until the cream cheese is just set and slightly puffed.
- Cool: Let the cookies cool on the baking sheets for 5 minutes, then transfer to a wire rack to cool completely before serving.
Notes
- Use gel food coloring for a vibrant red color without altering dough consistency.
- Make sure the cream cheese filling is well chilled for easier piping and better shape retention during baking.
- Do not overbake the cookies; the centers should remain soft for the best texture.
- Adjust red food coloring amount as needed for your preferred shade of red.
- Store cookies in an airtight container at room temperature for up to 3 days or refrigerate for up to a week.


