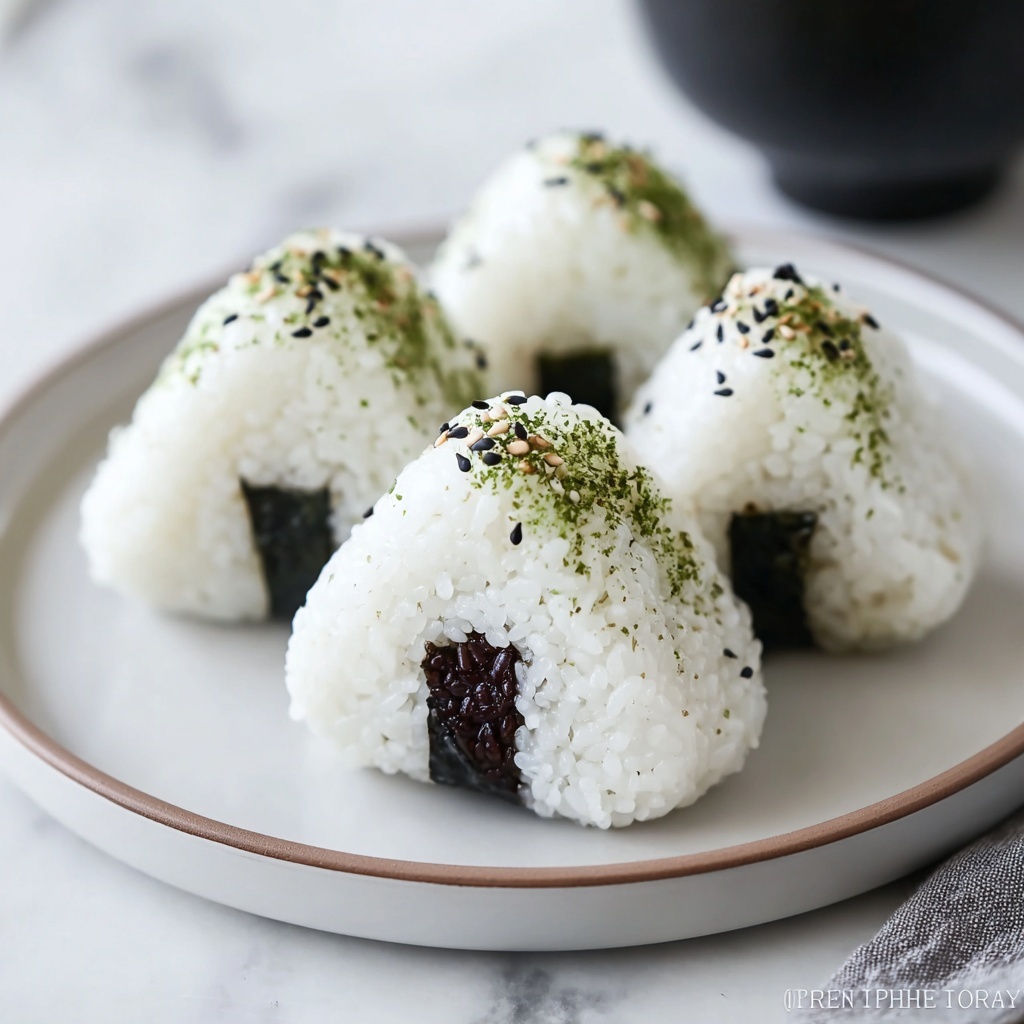
If you have ever wanted to try a fun, easy-to-make treat that you can totally personalize, then this Delicious Onigiri: Japanese Rice Balls You Can Customize Today Recipe is exactly what you need! These little rice triangles are so much more than just rice – they carry bursts of flavor and endless possibilities for fillings and toppings. Perfect as a snack, lunch, or picnic treat, onigiri offers that perfect balance of tender rice with savory accents wrapped in crisp nori. Let me take you through how simple and rewarding it is to whip up these customizable Japanese rice balls that are bound to become a household favorite.
Ingredients You’ll Need
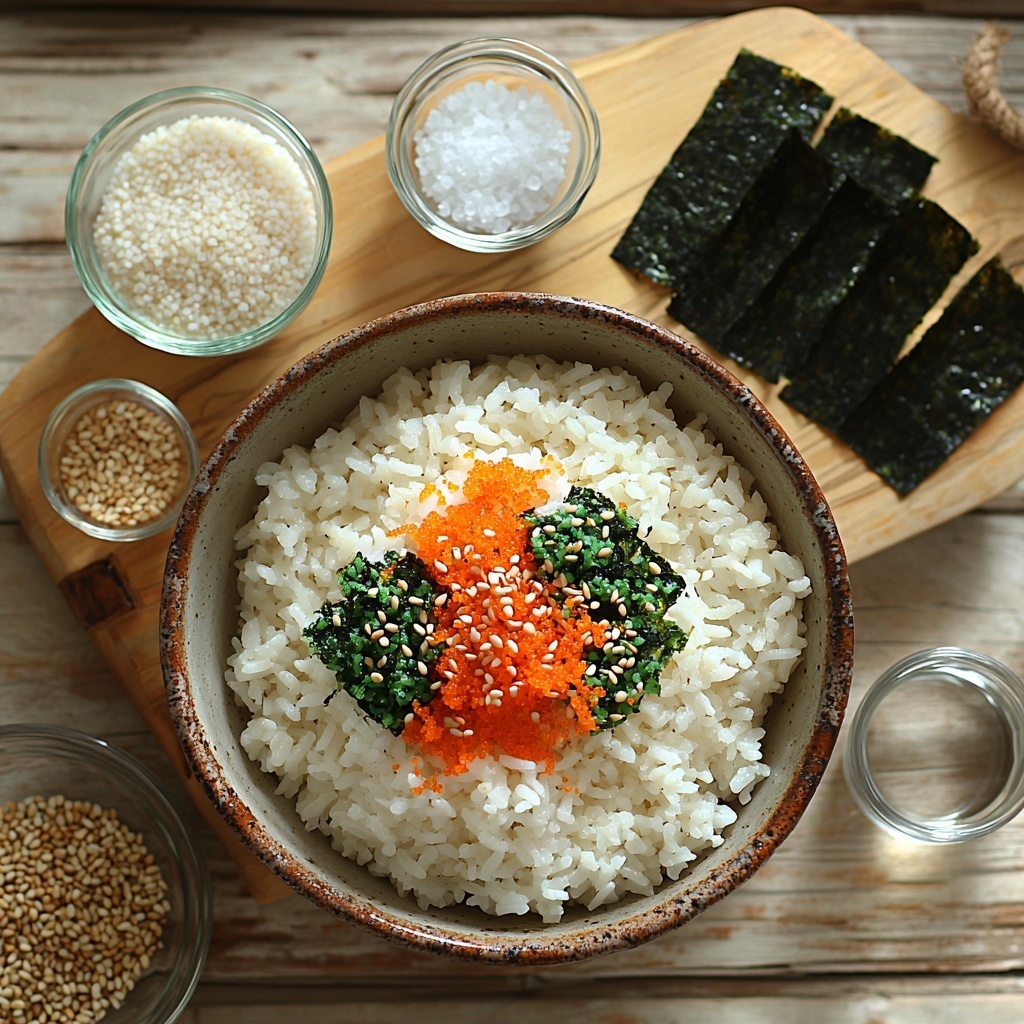
The ingredients for this Delicious Onigiri: Japanese Rice Balls You Can Customize Today Recipe are delightfully basic yet essential to capturing that authentic taste and texture. Each one brings its own magic, from the fluffiness of freshly cooked medium-grain rice to the vibrant umami punch of furikake seasoning.
- 2 cups Cooked Rice: Use freshly cooked medium-grain rice for the perfect sticky texture that holds shape well.
- 2 tablespoons Furikake: A wonderful Japanese seasoning blend that adds a savory umami boost to every bite.
- 1 cup Water: Essential for wetting your hands to prevent rice from sticking while shaping.
- 1 teaspoon Kosher Salt: Sprinkled on your hands, it enhances the subtle flavors of the rice by adding just the right amount of savory balance.
- 4 sheets Roasted Nori: These crisp seaweed sheets provide the traditional wrapping and add a pleasant texture contrast.
- 2 tablespoons Sesame Seeds (optional): A lovely nutty touch that gives the onigiri a subtle crunch and extra flavor dimension.
How to Make Delicious Onigiri: Japanese Rice Balls You Can Customize Today Recipe
Step 1: Mix and Season the Rice
Start by placing your freshly cooked rice in a large bowl and gently folding in the furikake. This seasoning blend is the heart of the recipe and infuses that unmistakable Japanese umami flavor, bringing life to the neutral rice.
Step 2: Prepare Your Hands
Wet your hands thoroughly with water—this step is crucial because it prevents the sticky rice from clinging to your fingers. Then, sprinkle a pinch of kosher salt on your hands to lightly season the rice and enhance its natural goodness as you shape it.
Step 3: Shape the Onigiri
Take roughly half a cup of the seasoned rice and gently press it into a compact triangle using your hands. You want enough pressure so it holds together but not so much that it becomes dense. For a clean edge, feel free to press the sides against a flat surface.
Step 4: Add the Nori Wrap and Optional Sesame Seeds
Wrap a strip of roasted nori around the base of each rice triangle, which not only adds an exciting texture but also makes for an easy grip. If you like, sprinkle sesame seeds on top for that delicate toasty crunch and a lovely visual touch.
Step 5: Enjoy or Store
Enjoy your onigiri fresh right away for the best texture and flavor, or wrap each rice ball tightly in plastic wrap to store for later. This delicious onigiri can be kept for a few days, making it great for meal prep or quick snacks.
How to Serve Delicious Onigiri: Japanese Rice Balls You Can Customize Today Recipe
Garnishes
While the classic nori wrap and sesame seeds do wonders, you can elevate your onigiri by adding pickled plums, fresh shiso leaves, or a sprinkle of toasted bonito flakes. These garnishes brighten the flavor and add a bit of flair to your presentation.
Side Dishes
Pair your onigiri with simple Japanese sides like miso soup, steamed edamame, or a small seaweed salad. These complementary dishes round out your meal, offering light and refreshing contrasts to the savory rice balls.
Creative Ways to Present
Try arranging your onigiri in a beautiful bento box alongside colorful vegetables or even cut into smaller bite-size pieces for party platters. Wrapping them individually in patterned parchment paper or placing them on leaf plates can instantly make them look festive and inviting.
Make Ahead and Storage
Storing Leftovers
If you have any leftover onigiri, store them wrapped tightly in plastic wrap or an airtight container in the refrigerator. They keep well for 3-4 days, making them an excellent option for quick snacks throughout the week.
Freezing
You can freeze onigiri by wrapping each piece individually in plastic wrap and placing them in a freezer-safe bag or container. Frozen onigiri maintain good quality for up to one month, perfect for prepping ahead when you’re short on time.
Reheating
To reheat, unwrap the onigiri and warm them gently in the microwave for about 30-45 seconds or until heated through. This method preserves the softness of the rice and keeps the nori from becoming chewy.
FAQs
Can I use a different type of rice?
Medium-grain rice is preferred for onigiri because of its sticky texture that helps the rice balls hold their shape, but short-grain rice can also work well. Long-grain rice is less sticky and might fall apart when shaped.
What are some traditional fillings for onigiri?
Common fillings include salted salmon, pickled plum (umeboshi), tuna with mayonnaise, or kombu (kelp). Feel free to get creative and add any savory or even sweet fillings you love.
Do I have to use furikake?
Furikake adds a wonderful umami flavor, but if you don’t have it, you can season your rice with a little salt or soy sauce before shaping. You can also roll onigiri in sesame seeds or add herbs for extra flavor.
How do you keep the nori crispy?
To keep the nori crisp, wrap it around the onigiri just before eating rather than storing wrapped for long periods. If you need to store them wrapped, separate the nori and rice by wrapping each separately and assembling right before serving.
Can onigiri be served warm or cold?
Onigiri tastes great both warm and at room temperature. Freshly made onigiri has a soft texture and rich aroma, but they’re just as delicious cold—making them ideal for packed lunches and picnics.
Final Thoughts
Making this Delicious Onigiri: Japanese Rice Balls You Can Customize Today Recipe is such a joyful experience because it’s simple yet endlessly versatile. Whether you keep it classic or add your own creative twist, these rice balls bring people together with their delightful taste and satisfying texture. I truly can’t recommend giving this recipe a try enough—once you start, onigiri will surely become a favorite go-to snack and meal component in your kitchen!
Print
Delicious Onigiri: Japanese Rice Balls You Can Customize Today Recipe
- Prep Time: 10 minutes
- Cook Time: 20 minutes (rice cooking time included)
- Total Time: 35 minutes
- Yield: 4 servings (4 onigiri)
- Category: Snack
- Method: No-Cook
- Cuisine: Japanese
- Diet: Gluten Free
Description
Delicious Onigiri are traditional Japanese rice balls that you can easily customize with flavorful seasonings and a crisp nori seaweed wrap. This recipe guides you through making perfectly shaped, seasoned rice balls that make a delightful snack or light meal.
Ingredients
Main Ingredients
- 2 cups Cooked Rice (Use freshly cooked medium-grain rice.)
- 2 tablespoons Furikake (Seasoning blend that adds umami.)
- 1 cup Water (For wetting hands while shaping.)
- 1 teaspoon Kosher Salt (Enhances the rice’s taste.)
- 4 sheets Roasted Nori (Cut into strips for easy handling.)
- 2 tablespoons Sesame Seeds (Optional for a nutty finish.)
Instructions
- Mix Rice and Furikake: In a mixing bowl, combine the freshly cooked medium-grain rice with furikake seasoning until the rice is evenly coated and flavorful.
- Prepare Hands: Wet your hands with water to prevent rice from sticking, then sprinkle a pinch of kosher salt onto your palms to season the rice as you shape it.
- Shape the Onigiri: Scoop approximately 1/2 cup of the seasoned rice and gently press it into a triangle shape using your hands. For a firmer shape, press the sides of the rice triangle against a flat surface.
- Add Nori Wrap: Take a strip of roasted nori and wrap it around the base of the shaped onigiri, ensuring it sticks well.
- Optional Garnish: If desired, sprinkle sesame seeds on top of the wrapped onigiri to add a nutty finish and extra texture.
- Serve or Store: Enjoy your onigiri fresh as a snack or meal component, or wrap each rice ball in plastic wrap to store for later consumption.
Notes
- Use freshly cooked medium-grain rice for the best texture—day-old rice is too dry to shape properly.
- Feel free to customize the furikake seasoning or add fillings like pickled plum, tuna, or salmon inside your onigiri.
- Keep a bowl of water nearby to wet your hands frequently to prevent rice from sticking.
- If you prefer, you can toast the nori just before wrapping to enhance its crispness.


