
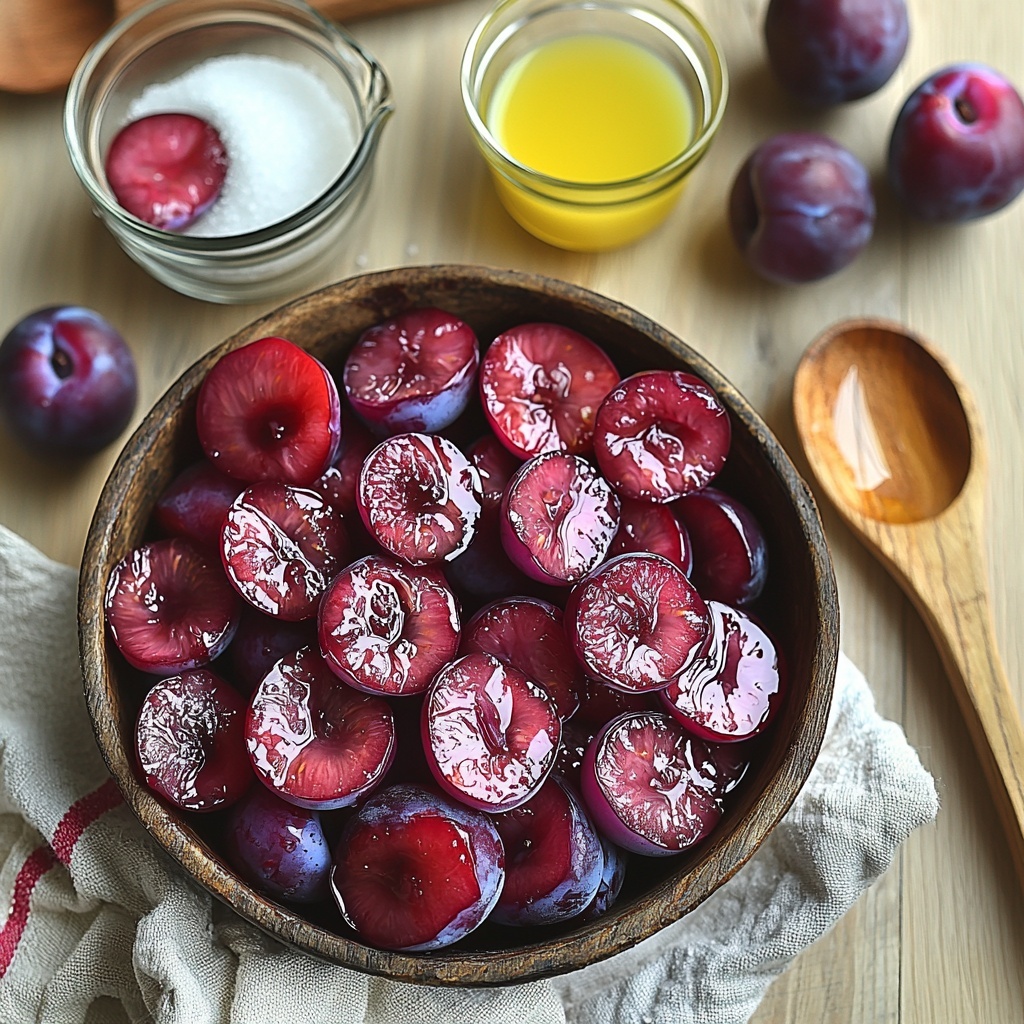
If you’ve ever wished for a homemade preserve that bursts with the bright, sweet tang of fresh fruit, you’re going to adore this Plum Jam Recipe: 5 Steps to Pure Deliciousness Recipe. It’s a simple, straightforward approach that transforms ripe plums into luscious, spreadable gold, perfect for breakfast toast, dolloping on yogurt, or sharing with friends. Each batch fills your kitchen with that inviting aroma of simmering fruit and vanilla, making the entire process as joyful as the delicious reward.
Ingredients You’ll Need
This recipe calls for just a handful of ingredients, each playing a crucial role in creating the perfect balance of sweetness, acidity, and flavor depth that makes this jam irresistible.
- 2 pounds fresh plums, pitted and chopped: The star of the show, ripe and juicy plums provide natural sweetness and vibrant color.
- 1 cup sugar: Essential for sweetness and preservation, sugar helps the jam set beautifully.
- 1 tablespoon lemon juice: Adds a bright tang that balances the sweetness and helps the jam gel perfectly.
- 1/2 teaspoon vanilla extract: Gives a warm, aromatic depth that elevates the flavor to something truly special.
How to Make Plum Jam Recipe: 5 Steps to Pure Deliciousness Recipe
Step 1: Wash and Prepare the Plums
Start by thoroughly washing your fresh plums to remove any dirt or residues. Then, pit and chop them into bite-sized pieces. This prep work is crucial – the smaller the pieces, the easier they will break down into that luscious, smooth jam texture.
Step 2: Combine Ingredients in a Pot
Next, place your chopped plums, sugar, lemon juice, and vanilla extract into a large pot. This combination sets the foundation for a jam that’s bursting with balanced sweetness and a lovely hint of citrus and warmth.
Step 3: Bring Mixture to a Boil
Turn the heat to medium and slowly bring your mix up to a gentle boil. This step begins the magic of breaking down the fruit and dissolving the sugar, infusing all the flavors together.
Step 4: Simmer and Stir
Once boiling, reduce the heat and let it simmer for about 30 minutes. Stir occasionally to prevent the jam from sticking to the pot and to encourage even cooking. You’ll notice it thickening and the color becoming richer — such an exciting transformation!
Step 5: Check Thickness and Jar
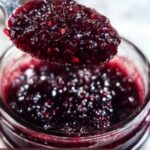
To test the jam’s consistency, place a small spoonful on a chilled plate and run your finger through it. If it wrinkles and doesn’t immediately run back together, your jam is ready. Pour it into sterilized jars while still hot, then seal tightly to preserve that fresh-from-the-garden taste.
How to Serve Plum Jam Recipe: 5 Steps to Pure Deliciousness Recipe
Garnishes
A sprinkle of toasted almond slivers or a few fresh mint leaves on top of your jam-topped dishes adds texture and a pop of freshness, making each bite even more delightful.
Side Dishes
This plum jam pairs beautifully with crusty bread, creamy cheeses like brie or goat cheese, and even dolloped over vanilla ice cream. It’s a small touch that can transform simple meals into memorable experiences.
Creative Ways to Present
For a charming twist, serve your plum jam in small glass jars tied with rustic twine or alongside warm scones during brunch. You can even swirl it into oatmeal or yogurt for a colorful, sweet breakfast treat that feels special every day.
Make Ahead and Storage
Storing Leftovers
Keep any leftover jam sealed in airtight jars and store them in the refrigerator. Properly stored, your plum jam will stay fresh and delicious for 3 to 4 days, making it easy to enjoy over several breakfasts or snacks.
Freezing
If you want to keep your plum jam longer, transfer it into freezer-safe containers and freeze for up to 3 months. When ready to use, thaw overnight in the refrigerator to retain its wonderful texture and flavor.
Reheating
To enjoy your jam warm, simply heat the desired amount gently in a saucepan over low heat or in the microwave for a few seconds. This will revive that just-cooked softness, perfect for drizzling or spreading.
FAQs
Can I use frozen plums for this jam recipe?
Absolutely! While fresh plums give the best texture and flavor, frozen plums can be used in a pinch. Just thaw and drain any excess liquid before cooking to maintain the right jam consistency.
Do I need to sterilize the jars before storing the jam?
Yes, sterilizing your jars is key to ensuring your plum jam stays fresh and safe to eat. It prevents bacteria and mold growth, extending the life of your homemade preserve.
Why do I need to add lemon juice?
Lemon juice balances the sweetness and enhances the natural flavor of the plums. It also plays an important role in helping the jam set properly by providing acidity.
Can I reduce the sugar amount in this recipe?
You can reduce sugar slightly, but keep in mind that sugar helps with both sweetness and preserving. Reducing too much may affect the jam’s texture and shelf life.
How do I know when the jam is done cooking?
The jam is ready when it thickens enough to wrinkle on a cold plate when tested. This usually happens after about 30 minutes of simmering, but keep an eye on it to avoid overcooking.
Final Thoughts
Making your own jam is such a rewarding little adventure, and this Plum Jam Recipe: 5 Steps to Pure Deliciousness Recipe is one of my absolute favorites. It’s approachable for cooks of all levels and delivers that unbeatable flavor that only homemade can bring. I can’t wait for you to try it out and fill your kitchen with that wonderful sweet and fruity aroma. Happy cooking and even happier eating!
Print
Plum Jam Recipe: 5 Steps to Pure Deliciousness Recipe
- Prep Time: 10 minutes
- Cook Time: 35 minutes
- Total Time: 45 minutes
- Yield: 4 servings (approximately 2 half-pint jars)
- Category: Jam and Preserves
- Method: Stovetop
- Cuisine: American
Description
This Plum Jam recipe offers a simple and delicious way to capture the sweet and tart flavors of fresh plums. With just a few ingredients, you can create a smooth, flavorful jam perfect for spreading on toast or adding to desserts. The slow simmering method ensures the jam thickens beautifully while preserving the natural plum taste.
Ingredients
Ingredients
- 2 pounds fresh plums, pitted and chopped
- 1 cup sugar
- 1 tablespoon lemon juice
- 1/2 teaspoon vanilla extract
Instructions
- Prepare the Plums: Wash the fresh plums thoroughly, then pit and chop them into small pieces to ensure they cook evenly.
- Combine Ingredients: Place the chopped plums, sugar, lemon juice, and vanilla extract into a large pot, stirring gently to combine all ingredients.
- Boil the Mixture: Heat the pot over medium heat until the mixture comes to a full rolling boil, making sure to stir regularly to prevent sticking.
- Simmer the Jam: Reduce the heat to low and let the jam simmer for about 30 minutes, stirring occasionally to avoid burning and to help the jam thicken.
- Check for Thickening: Test the jam’s consistency by placing a small amount on a chilled plate; if it gels and wrinkles when pushed, it is ready.
- Jar the Jam: Pour the hot jam into sterilized jars, seal tightly, and allow to cool completely before storing.
Notes
- Use ripe but firm plums for best texture and flavor.
- Ensure jars are properly sterilized to prevent spoilage.
- Store the jam in the refrigerator and consume within a few weeks, or process jars in a water bath for longer shelf life.
- If you prefer a smoother texture, you can mash the plums before cooking or blend slightly after cooking.
