
“`html
If you’re searching for a cookie that combines classic charm with an irresistible texture, look no further than this Chewy Rippled Chocolate Chip Cookies That Wow Every Time Recipe. These cookies bring together buttery softness, just the right chew, and delightful ripples of chocolate in every bite. They are perfect for cozy afternoons, celebrations, or simply whenever you crave something sweet that feels homemade and heartwarming. Once you make this recipe, I promise these cookies will quickly become a beloved staple in your baking repertoire.
Ingredients You’ll Need
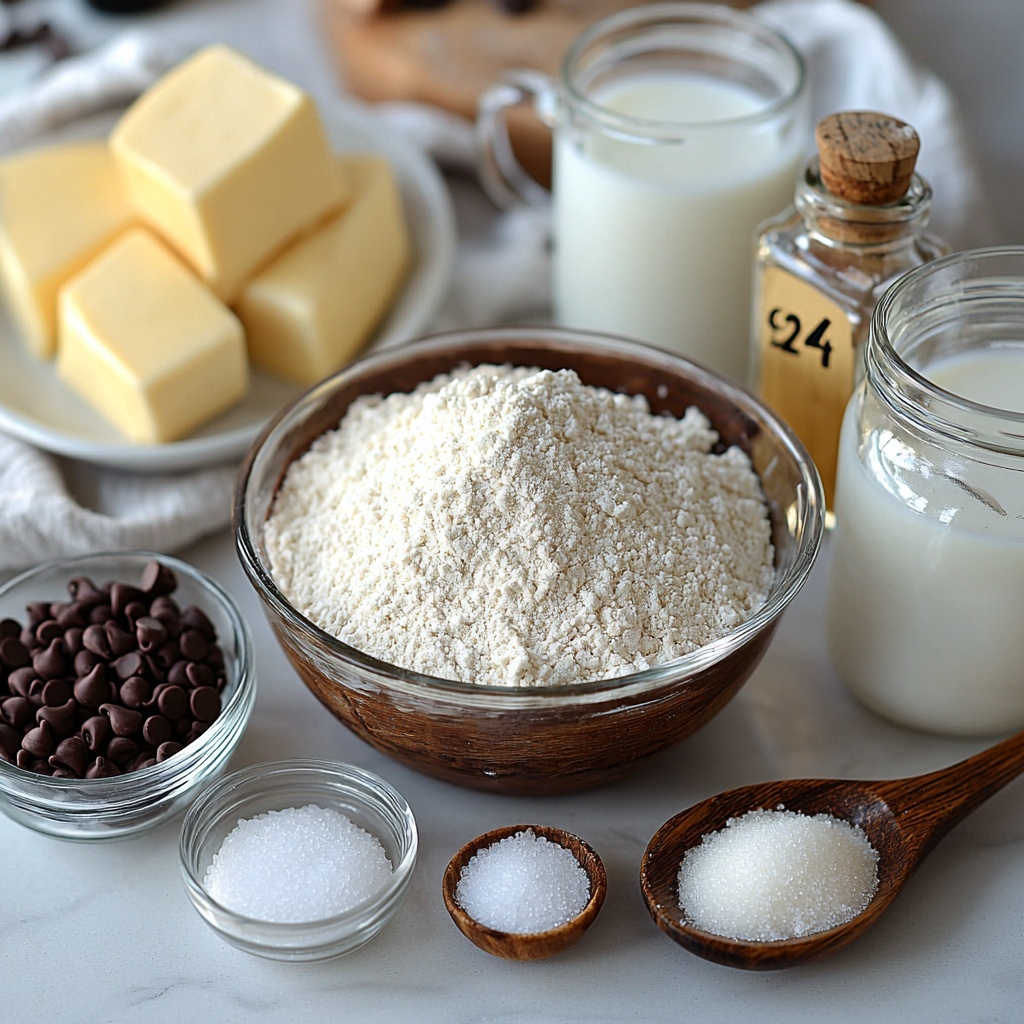
Gathering simple, everyday pantry staples is all it takes to create these irresistible cookies. Each ingredient plays a crucial role, from creating that soft chewiness to adding rich flavor and a perfect golden color.
- 2 cups All-Purpose Flour: The foundation of the dough, providing structure and that classic cookie crumb.
- 1 teaspoon Salt: Enhances all the flavors and balances sweetness beautifully.
- 1 teaspoon Baking Soda: Make sure it’s fresh for the best rise and that perfect chewy texture.
- 1 cup Light Brown Sugar: Packed firmly, it adds moisture and a subtle caramel undertone.
- 1 cup Granulated Sugar: For sweetness and a slight crisp edge on the cookies.
- 1 cup Unsalted Butter (softened): Room temperature butter blends smoothly, lending richness and tenderness.
- 2 teaspoons Vanilla Extract: Use a high-quality extract to infuse warm, aromatic flavor.
- 2 large Eggs (beaten until pale yellow): They bind everything and add to the chew factor.
- 1 cup Mini Chocolate Chips: Tiny bursts of chocolate goodness; you can swap with chopped or white chocolate for a twist.
- 2 cups Milk: Not part of the dough but serves best warm alongside the cookies for the perfect pairing.
How to Make Chewy Rippled Chocolate Chip Cookies That Wow Every Time Recipe
Step 1: Creaming Your Sugars and Butter
Start by combining your light brown sugar, granulated sugar, and softened butter. Cream them together until everything is well blended, light, and fluffy. This step creates the amazing base that gives these cookies their chewy texture and depth of flavor.
Step 2: Adding Eggs and Vanilla
Next, add in the beaten eggs and the vanilla extract. Mix until the batter is smooth and glossy. The eggs add structure and richness, while the vanilla brings that warm, familiar aroma everyone loves in chocolate chip cookies.
Step 3: Whisk Dry Ingredients Separately
In a separate bowl, whisk together the all-purpose flour, salt, and baking soda. This ensures even distribution of the leavening agents and salt, which will help the cookies rise perfectly and have balanced flavor.
Step 4: Combine Dry and Wet Ingredients
Gradually fold the dry mixture into the wet ingredients. Be gentle and stir just until combined to avoid overmixing, which can make the cookies tough instead of tender and chewy.
Step 5: Fold in the Mini Chocolate Chips
Gently fold in the mini chocolate chips to spread their sweet melts evenly throughout the dough. Their smaller size guarantees chocolate in almost every bite, making these cookies truly delicious.
Step 6: Prepare to Bake
Scoop generous portions of dough onto a lined baking sheet, spacing them about two inches apart to give the cookies room to spread without merging. Each cookie should look like it’s ready to bloom into chewy perfection.
Step 7: Bake with Care
Set your oven to 375°F (190°C). Bake the cookies for 8 to 10 minutes until their edges start to turn golden. This warm temperature is just right to develop a crispy outer rim while keeping the centers soft and chewy.
Step 8: The Secret Ripple Trick
About 2 or 3 minutes before the cookies are fully baked, remove the baking sheet from the oven. Firmly tap the sheet against your counter; this simple shake encourages those beautiful ripples to form as the dough settles. Then, return the cookies to the oven to finish baking, locking in that signature chewy texture.
Step 9: Cool and Enjoy
Transfer the cookies to a cooling rack and let them cool completely. This helps them set perfectly and makes them easier to handle. Soon you’ll be biting into the warm, chewy magic of this Chewy Rippled Chocolate Chip Cookies That Wow Every Time Recipe.
How to Serve Chewy Rippled Chocolate Chip Cookies That Wow Every Time Recipe
Garnishes
Elevate your cookies with a sprinkle of flaky sea salt on top just before baking to highlight the sweetness and add a delightful crunch. A dusting of powdered sugar or a drizzle of melted chocolate can also add a touch of elegance for special occasions.
Side Dishes
Nothing pairs quite like a tall glass of cold milk or a warm cup of your favorite coffee or tea. The 2 cups of milk in this recipe’s ingredient list are perfect to serve alongside, creating a cozy, nostalgia-filled experience with every bite.
Creative Ways to Present
Arrange the cookies in a rustic wooden box with parchment paper or stack them neatly on a decorative plate tied with a ribbon for gifting. You can also sandwich two cookies with vanilla or chocolate ice cream for an indulgent treat everyone will adore.
Make Ahead and Storage
Storing Leftovers
Keep your cookies fresh by storing them in an airtight container at room temperature. They will stay delightfully soft and chewy for up to 3-4 days, giving you plenty of time to nibble away at these sweet delights.
Freezing
If you want to enjoy these cookies at a later date, simply freeze the baked cookies in a sealed bag or container. They maintain their delicious texture and flavor well, and can be kept frozen for up to 2 months. Just thaw them at room temperature before enjoying.
Reheating
Warm your cookies briefly in the microwave for 10-15 seconds or pop them into a preheated oven at 300°F for 5 minutes. Reheating revives their softness and brings out that freshly baked aroma, making them taste like they just came out of your oven.
FAQs
Can I substitute the mini chocolate chips with regular sized chips?
Absolutely! You can use regular chocolate chips or chopped chocolate chunks if you prefer. Just keep in mind that mini chips distribute more evenly, giving you consistent chocolatey bites in every mouthful.
Why do the cookies have ripples?
The ripples happen thanks to a clever baking technique—tapping the baking sheet mid-bake—which allows the dough to settle more evenly and creates those charming wavy textures that make these cookies so special.
Can I make the dough ahead of time?
Yes! The dough can be refrigerated for up to 24 hours before baking. Chilling helps the flavors meld and actually enhances the chewiness once baked.
Is unsalted butter necessary?
Using unsalted butter gives you control over the saltiness of your cookies. Since the recipe already includes salt, unsalted butter helps balance the flavor perfectly.
What if I don’t have milk on hand to serve?
No worries! These cookies are delicious enough to enjoy on their own, but you can also serve them with coffee, tea, or even a dairy-free milk alternative for a wonderful pairing.
Final Thoughts
I’m so excited for you to try this Chewy Rippled Chocolate Chip Cookies That Wow Every Time Recipe because it truly brings warmth, joy, and that unmistakable ‘wow’ factor every time you bake. These cookies are not just a treat but an experience—one that invites you to slow down, savor, and share the simple pleasures of home baking. Trust me, once you taste these, you’ll be coming back to this recipe again and again!
“`
Print
Chewy Rippled Chocolate Chip Cookies That Wow Every Time Recipe
- Prep Time: 15 minutes
- Cook Time: 10 minutes
- Total Time: 25 minutes
- Yield: 24 servings
- Category: Dessert
- Method: Baking
- Cuisine: American
Description
Discover the ultimate chewy rippled chocolate chip cookies, perfect every time. These cookies combine a rich blend of light brown and granulated sugars with softened butter, vanilla, and mini chocolate chips to create a soft yet textured treat. Baked to a golden perfection with a slight crisp on the edges, each bite offers a delightful balance of sweetness and chewiness. Ideal for enjoying warm with a cup of milk or as a delicious snack any time of day.
Ingredients
Dry Ingredients
- 2 cups All-Purpose Flour
- 1 teaspoon Salt
- 1 teaspoon Baking Soda (fresh for best results)
Wet Ingredients
- 1 cup Unsalted Butter (softened to room temperature)
- 1 cup Light Brown Sugar (firmly packed)
- 1 cup Granulated Sugar
- 2 large Eggs (beaten until pale yellow)
- 2 teaspoons Vanilla Extract (high-quality)
Add-ins
- 1 cup Mini Chocolate Chips (or chopped chocolate/white chocolate chips as substitute)
- 2 cups Milk (for serving, best enjoyed warm)
Instructions
- Preparation: Gather all ingredients and preheat your oven to 375°F (190°C). Line a baking sheet with parchment paper to prevent sticking.
- Creaming the sugars and butter: In a large mixing bowl, cream together the light brown sugar, granulated sugar, and softened unsalted butter until the mixture is smooth, creamy, and well combined. This helps create the chewy texture.
- Adding eggs and vanilla: Beat the two large eggs until pale yellow and add them along with the vanilla extract to the creamed mixture. Mix until everything is smooth and uniformly combined.
- Mixing dry ingredients: In a separate bowl, whisk together the all-purpose flour, salt, and baking soda, ensuring that the baking soda is fresh to allow proper rising and texture.
- Combining wet and dry ingredients: Gradually fold the dry ingredients into the wet mixture, stirring gently until just combined to avoid over-mixing, which can toughen the cookies.
- Incorporating chocolate chips: Fold in the mini chocolate chips evenly throughout the dough to distribute the chocolate in every bite.
- Shaping the cookies: Using a cookie scoop or spoon, scoop the dough onto the prepared baking sheet, spacing each mound about two inches apart to allow for spreading during baking.
- Baking the cookies: Bake in the preheated oven for 8 to 10 minutes or until the edges begin to turn golden but the centers are still soft.
- Ripple technique: Remove the baking sheet from the oven a couple of minutes before the cookies are fully baked. Firmly tap the baking sheet against the countertop to create ripples and texture in the cookies, then return to the oven to finish baking for the remaining time.
- Cooling: Once baked, transfer the cookies to a cooling rack and allow them to cool completely before serving to set their chewy, rippled texture.
- Serving suggestion: Enjoy the chewy rippled chocolate chip cookies warm or cooled, ideally paired with a glass of warm milk for the best experience.
Notes
- Make sure the baking soda is fresh for optimal leavening and texture.
- Softened butter at room temperature is key for proper creaming with sugar.
- Do not over-mix the dough once the dry ingredients are added to keep cookies tender.
- Spacing cookies properly prevents them from merging during baking.
- Tapping the baking sheet mid-bake creates the distinctive rippled texture.
- Allow cookies to cool fully to develop their chewy consistency.
- Substitute mini chocolate chips with chopped chocolate or white chocolate chips according to preference.


