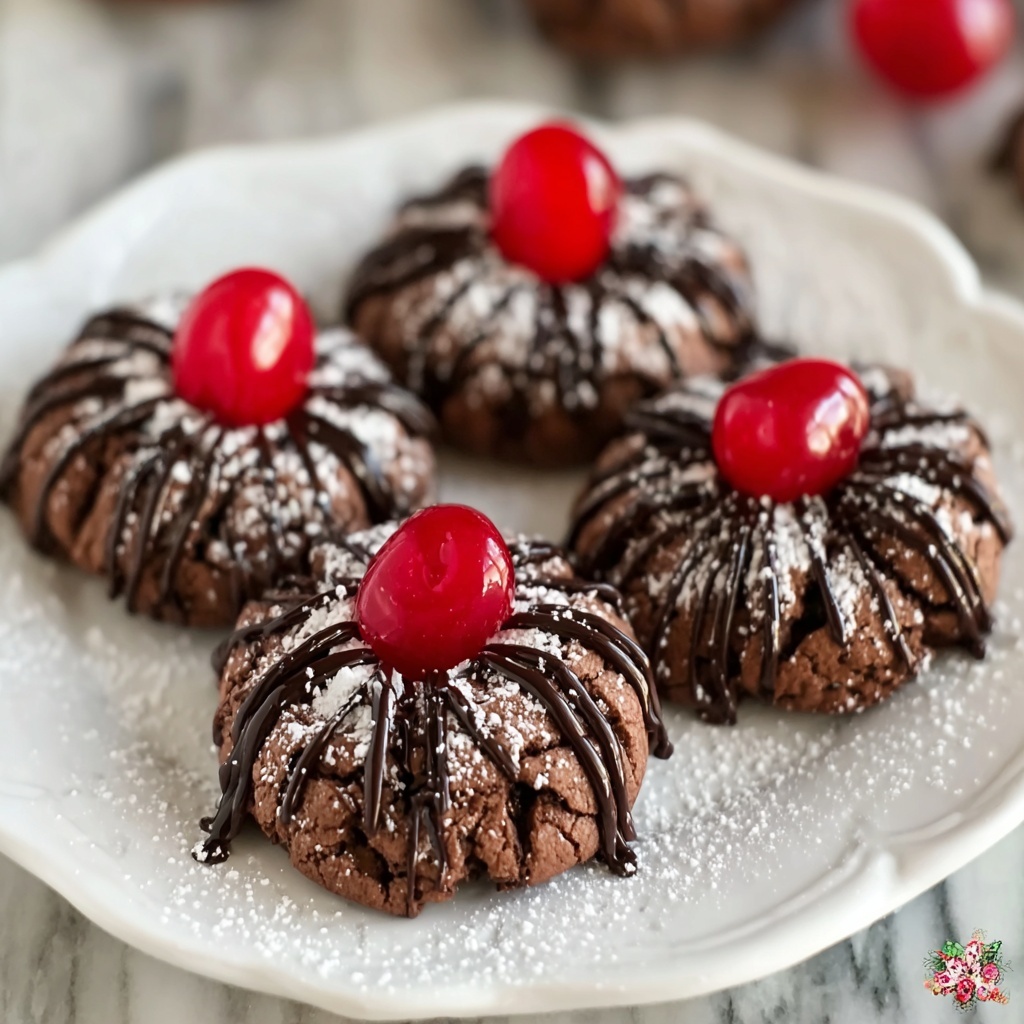
If you have a sweet tooth and a love for nostalgic treats, you are going to adore this Chocolate-Covered Cherry Thumbprints Recipe. These little gems combine buttery, tender cookies with a burst of fruity cherry preserves, all finished off with a decadent layer of glossy, melted semisweet chocolate. Every bite melts in your mouth and offers a perfect balance of rich and bright flavors. Whether you’re baking for a holiday, a party, or just because, these thumbprints will quickly become a cherished favorite in your cookie collection.
Ingredients You’ll Need
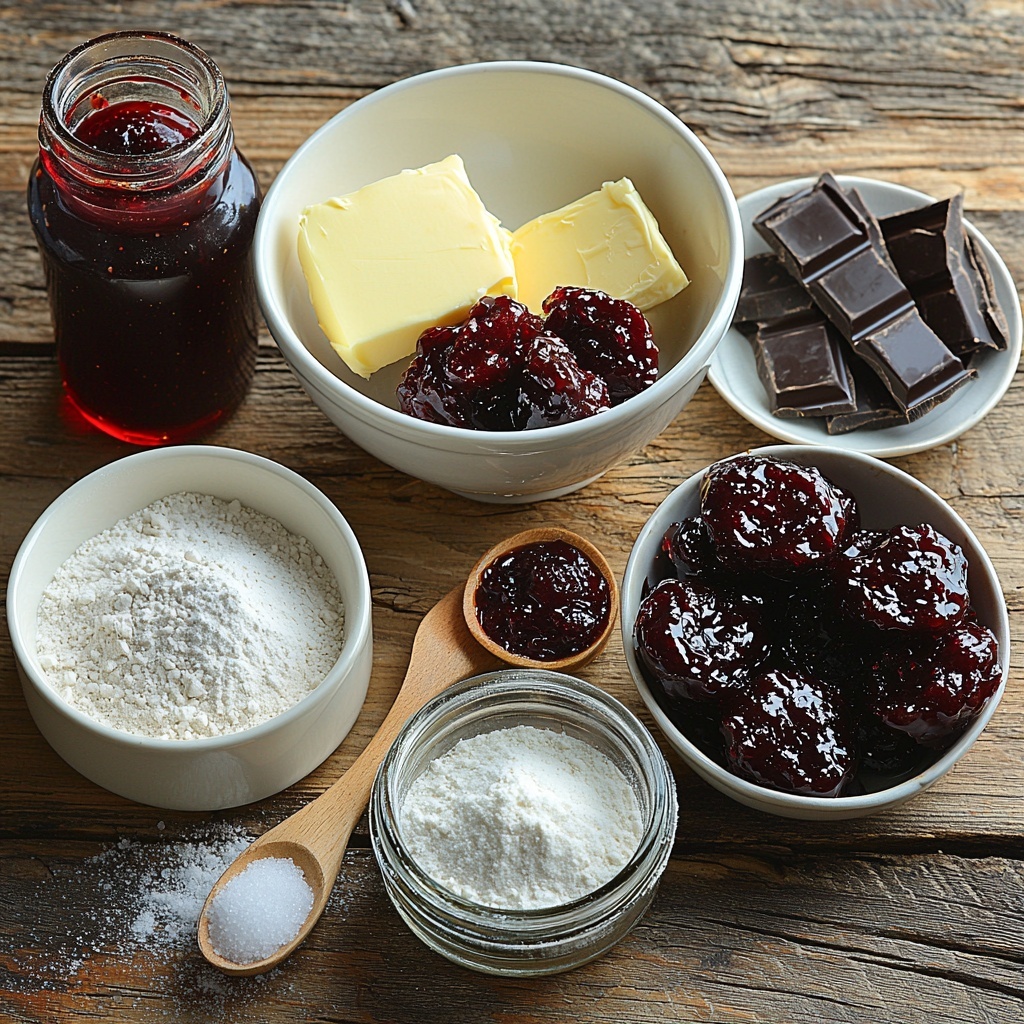
This Chocolate-Covered Cherry Thumbprints Recipe uses simple, pantry-friendly ingredients that come together beautifully. Each one plays a vital role in creating the perfect texture, flavor, and gorgeous appearance.
- 1 cup unsalted butter, softened: Provides a rich, creamy base that makes the cookies tender and melt-in-your-mouth soft.
- 1 cup granulated sugar: Adds sweetness and helps create a light, fluffy dough when creamed with butter.
- 1 teaspoon vanilla extract: Enhances the overall sweetness and adds a warm, inviting aroma.
- 2 cups all-purpose flour: The foundation for the dough, giving structure and that classic cookie chewiness.
- 1/4 teaspoon salt: Balances the sweetness and brings out the other flavors perfectly.
- 1/2 cup cherry preserves: The star filling—bright, fruity, and packed with bursts of cherry flavor in every thumbprint.
- 8 ounces semisweet chocolate, chopped: Melted to create a rich, glossy coating that adds a luxurious chocolate finish.
- 2 tablespoons shortening: Helps the chocolate stay smooth and dip-ready, giving you that perfect glossy shine.
How to Make Chocolate-Covered Cherry Thumbprints Recipe
Step 1: Prepare Your Oven and Cream the Butter
First things first: preheat your oven to 350°F (175°C). In a large bowl, beat the softened butter with the sugar until the mixture is light and fluffy. This step is crucial because it aerates the dough, ensuring your cookies will be tender yet slightly crumbly.
Step 2: Mix in Flavor and Flour
Next, gently beat in the vanilla extract to infuse your dough with that classic, irresistible scent. Then, gradually add the all-purpose flour and salt, stirring just until everything is combined to avoid overworking the dough.
Step 3: Shape the Dough
Roll the dough into 1-inch balls. Place them spaced apart on your baking sheets. This sizing ensures perfect bite-sized thumbprints—each cookie will have that just-right balance between dough and filling.
Step 4: Create the Indentations and Add Cherry Preserves
This is the fun part—use your thumb to gently press an indentation into the center of each ball. Fill these little wells generously with cherry preserves. The fruit filling will bake into a sweet, sticky burst that perfectly complements the buttery cookie.
Step 5: Bake Until Golden
Bake the cookies for 15 to 18 minutes, or until they are lightly golden around the edges. The short bake time keeps them soft and delicate, not dry or crumbly.
Step 6: Melt Chocolate and Dip
While the cookies are cooling, melt the semisweet chocolate with the shortening in a microwave-safe bowl using 30-second intervals, stirring after each, until smooth and shiny. Dip the tops of the cooled cookies into the melted chocolate and place them on a wire rack to set. This chocolate coating gives each cookie a rich finish and adds that irresistible snap when you bite in.
How to Serve Chocolate-Covered Cherry Thumbprints Recipe
Garnishes
For an extra-special touch, sprinkle a few finely chopped roasted nuts, like pistachios or almonds, over the wet chocolate for both texture and a lovely color contrast. Edible gold dust also makes a dazzling presentation for festive occasions.
Side Dishes
Serve these cookies alongside a hot cup of freshly brewed coffee or a glass of cold milk. Their rich chocolate and sweet cherry flavors pair wonderfully with the comforting bitterness of coffee or the creamy neutrality of milk.
Creative Ways to Present
Try arranging them on a tiered dessert platter for parties, or place a few in a clear cellophane bag tied with a pretty ribbon for homemade gift-giving. These cookies also shine when served with a scoop of vanilla ice cream or alongside a bowl of fresh berries for a light dessert.
Make Ahead and Storage
Storing Leftovers
You can keep leftover Chocolate-Covered Cherry Thumbprints in an airtight container at room temperature for 3 to 4 days. This way, they maintain their soft texture and delicious flavor without drying out.
Freezing
If you want to make these cookies ahead of time, they freeze beautifully. Place them in a single layer on a baking sheet to freeze first, then transfer to a sealed container or freezer bag. They can be frozen for up to 2 months without losing their wonderful taste or texture.
Reheating
When ready to enjoy, simply let frozen cookies thaw at room temperature for about 30 minutes. If you prefer them slightly warm, pop them in a low oven (300°F) for 5 minutes, but avoid microwaving or overheating to keep that perfect chocolate coating intact.
FAQs
Can I use other types of jam instead of cherry preserves?
Absolutely! Raspberry, strawberry, or apricot preserves also work beautifully in this recipe. Just be sure to pick a preserve that’s thick enough to hold its shape during baking.
Do I need to use shortening in the chocolate?
While not mandatory, shortening helps make the melted chocolate smooth and glossy, which makes dipping easier and results in a nicer finish on the cookies.
Why do the cookies need to be baked before adding the chocolate?
Baking the cookies first ensures they are perfectly cooked through and soft. Adding the chocolate afterward prevents it from burning or losing its sheen from the oven’s heat.
Can I make these cookies gluten-free?
Yes! Substitute the all-purpose flour with a 1-to-1 gluten-free baking flour blend. Just make sure your blend contains xanthan gum or a similar binder for the best texture.
How long does it take for the chocolate to set?
Once dipped, the chocolate typically sets at room temperature within 30 to 60 minutes, depending on your kitchen’s temperature. For faster results, placing the cookies in the refrigerator works great.
Final Thoughts
This Chocolate-Covered Cherry Thumbprints Recipe is a delightful blend of simple ingredients transformed into a show-stopping treat. The balance of buttery cookie, luscious cherry preserves, and silky chocolate makes it a real crowd-pleaser. I hope you’ll enjoy making and sharing these as much as I do—they’re perfect for both everyday enjoyment and special occasions. Happy baking and happy tasting!
Print
Chocolate-Covered Cherry Thumbprints Recipe
- Prep Time: 15 minutes
- Cook Time: 18 minutes
- Total Time: 33 minutes
- Yield: 24 servings
- Category: Dessert
- Method: Baking
- Cuisine: American
- Diet: Vegetarian
Description
Delightful Chocolate-Covered Cherry Thumbprints combine buttery, soft cookies with a sweet cherry center and a rich chocolate coating. Perfect for holidays or any occasion, these thumbprint cookies offer a beautiful balance of fruity sweetness and decadent chocolate in every bite.
Ingredients
Dough Ingredients
- 1 cup unsalted butter, softened
- 1 cup granulated sugar
- 1 teaspoon vanilla extract
- 2 cups all-purpose flour
- 1/4 teaspoon salt
Filling
- 1/2 cup cherry preserves
Chocolate Coating
- 8 ounces semisweet chocolate, chopped
- 2 tablespoons shortening
Instructions
- Preheat oven: Preheat the oven to 350°F (175°C) to prepare for baking the cookies evenly.
- Cream butter and sugar: In a large bowl, beat together the softened butter and granulated sugar until the mixture becomes light and fluffy, which ensures a tender texture.
- Add vanilla: Beat in the vanilla extract to impart a warm, fragrant flavor to the dough.
- Mix dry ingredients: Gradually stir in the all-purpose flour and salt until just combined to form a soft cookie dough.
- Shape dough balls: Roll the dough into 1-inch balls and place them spaced on baking sheets to prepare for baking.
- Create indentations: Use your thumb to gently press an indentation in the center of each ball to hold the cherry preserves.
- Fill with preserves: Spoon cherry preserves into each indentation, providing a juicy, fruity center to the cookies.
- Bake: Bake the cookies in the preheated oven for 15-18 minutes or until the bottoms are lightly golden, ensuring they are cooked through but tender.
- Melt chocolate mixture: In a microwave-safe bowl, combine the chopped semisweet chocolate and shortening. Microwave in 30-second intervals, stirring each time, until the mixture is fully melted and smooth.
- Dip cookies: Dip the tops of the cooled cookies into the melted chocolate mixture, then place them on a wire rack to cool and allow the chocolate to set beautifully.
Notes
- Make sure the butter is softened at room temperature for easier creaming with sugar.
- Do not overmix the dough once the flour is added to keep the cookies tender.
- The shortening in the chocolate helps achieve a smooth, shiny coating and prevents the chocolate from hardening too brittle.
- Allow the cookies to cool completely before dipping in chocolate to prevent melting and ensure the chocolate adheres properly.
- You can substitute cherry preserves with other fruit jams like raspberry or strawberry for variation.


