“`html
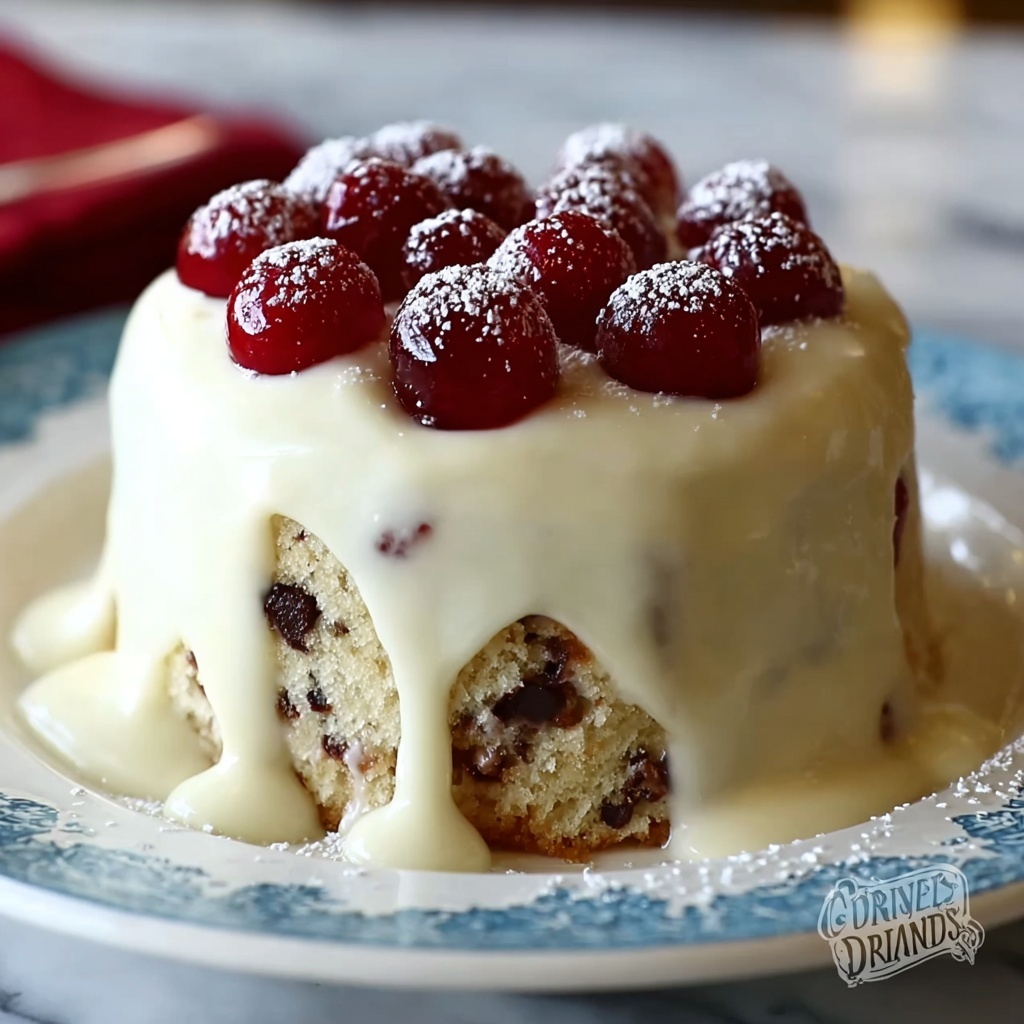
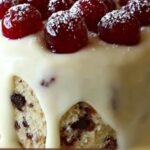
If you’re looking for a charming and festive treat to brighten your holiday gatherings, the Mary Berry Mini Christmas Cakes to Delight Your Holiday Spirit Recipe is a total must-try. These petite, lovingly spiced cakes studded with juicy dried fruit and topped with classic festive decorations bring that magical warmth and joy that only Christmas baking can deliver. Perfectly sized for individual enjoyment, these mini cakes combine simplicity and tradition in every bite, making them a delightful centerpiece for your holiday celebrations.
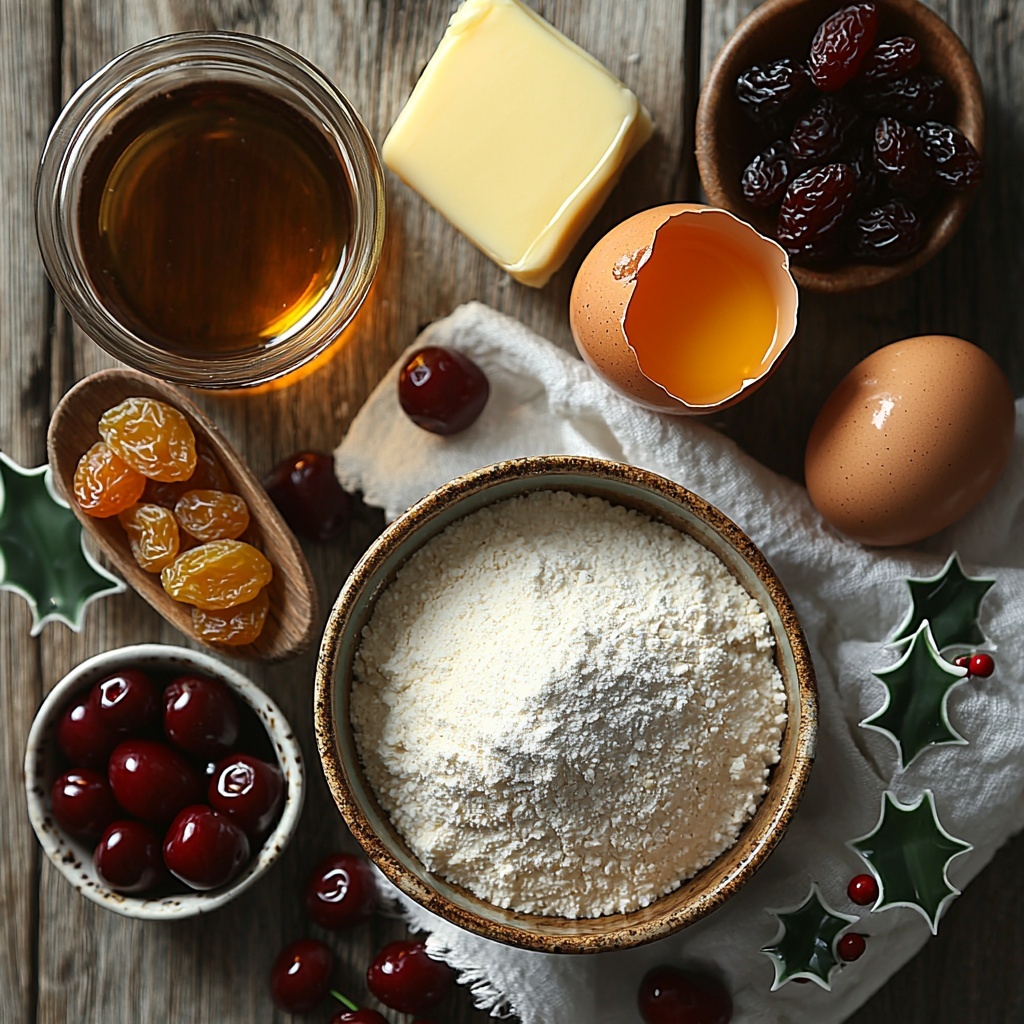
Ingredients You’ll Need
Gathering these ingredients is a breeze, and each one plays a key role in shaping the flavor, texture, and festive look of your Mary Berry Mini Christmas Cakes to Delight Your Holiday Spirit Recipe. From the softness of the butter to the sparkle of glacé cherries, each element contributes something special.
- 175 g Butter (softened): Provides richness and helps create that tender, moist crumb.
- 175 g Light Brown Soft Sugar: Adds sweetness with a hint of caramel depth for warmth.
- 3 large Eggs (beaten): Binds the cake and gives it a lovely structure and rise.
- 175 g Self-Raising Flour: Ensures a light, fluffy texture with gentle lift.
- 2 tsp Ground Mixed Spice: A blend of warming spices that evoke the festive season’s cozy spirit.
- 115 g Mixed Dried Fruit: Bursts of chewy sweetness and fruity flavors throughout the cake.
- 2 tbsp Brandy or Orange Juice: Infuses the fruit and cake with subtle aromatic moisture and zing.
- 115 g Icing Sugar: For a smooth, sweet glaze that finishes the cakes beautifully.
- 1-2 tbsp Warm Water: To loosen the icing sugar glaze for perfect spreading.
- Glacé Cherries (for decoration): Adds classic pops of color and festive charm at the top.
- Icing Holly Leaves (for decoration): Finishing touch for that iconic Christmas look.
How to Make Mary Berry Mini Christmas Cakes to Delight Your Holiday Spirit Recipe
Step 1: Preparing Your Oven and Tin
Start by preheating your oven to 160°C (320°F), a gentle temperature perfect for baking mini cakes that stay moist inside without drying out. Line your mini cake tin with parchment paper to make sure the cakes come out flawlessly after baking.
Step 2: Creating the Base Batter
Cream the softened butter together with the light brown soft sugar until the mixture is light and fluffy — this usually takes about 3 to 5 minutes. This step is key to giving your cakes their wonderfully soft texture. Then, gradually beat in the three large eggs, making sure each addition is fully incorporated before adding the next to maintain the batter’s volume.
Step 3: Adding Flour and Spice
Sift the self-raising flour and ground mixed spice directly into your batter bowl. Gently fold these into the mixture so you keep all that lovely air you’ve worked to build up. The spiceblend gives the cakes their signature festive flavor, evoking comforting notes of cinnamon, nutmeg, and cloves.
Step 4: Incorporating the Fruit and Flavor Boost
Next, carefully fold in the mixed dried fruit and your choice of brandy or orange juice. This addition not only moistens the cakes but also infuses them with a nuanced, festive tang and sweetness that feels truly special with every bite.
Step 5: Baking the Mini Cakes
Spoon your delightful batter evenly into the prepared mini cake tin, smoothing the tops gently for an even bake. Place in the preheated oven and bake for 20-25 minutes, or until a toothpick inserted into the center comes out clean. This timing ensures the cakes are cooked through yet remain tender and moist.
Step 6: Cooling and Decorating
Allow your mini cakes to cool completely in the tin before carefully removing them. Once cooled, mix the icing sugar with warm water to create a smooth glaze and spread it gently over the tops. Finally, decorate with glacé cherries and icing holly leaves for that unmistakable festive flair.
How to Serve Mary Berry Mini Christmas Cakes to Delight Your Holiday Spirit Recipe
Garnishes
While the traditional glacé cherries and icing holly leaves are delightful, you can elevate presentation by dusting a little extra icing sugar over the cakes to mimic fresh snow or adding a small sprig of fresh rosemary or thyme to echo holiday greenery.
Side Dishes
These cakes shine brightly alongside a cup of rich mulled wine or spiced tea. You might also serve them with dollops of clotted cream or mascarpone to contrast their spiced sweetness with creamy indulgence.
Creative Ways to Present
Arrange these mini Christmas cakes on a rustic wooden board or a bright holiday-themed plate. Tuck in some pine cones, cinnamon sticks, or even fairy lights nearby to create a festive visual that complements their charm. Gift-wrapping a few in cellophane tied with ribbon also makes for a thoughtful homemade gift.
Make Ahead and Storage
Storing Leftovers
Your Mary Berry Mini Christmas Cakes to Delight Your Holiday Spirit Recipe keeps wonderfully when stored in an airtight container at room temperature for 3-4 days. This window allows the flavors to meld without sacrificing freshness.
Freezing
If you want to make these festive treats ahead of time, freezing is a fantastic option. Wrap each cake individually in cling film, place inside an airtight container or freezer bag, and freeze for up to 1 month. Thaw at room temperature before glazing and decorating.
Reheating
To enjoy your cakes warm, gently reheat them in a low oven (around 140°C/285°F) for 5-8 minutes. This method preserves their delicate texture without drying them out, making each bite feel freshly baked.
FAQs
Can I substitute the dried fruit with fresh fruit?
Fresh fruit is generally too moist for this type of cake and could affect the texture and baking time, so dried fruit is best for retaining the classic rich, dense quality of these mini Christmas cakes.
Is it okay to use orange juice instead of brandy?
Absolutely! Orange juice adds a lovely citrus brightness and keeps the recipe alcohol-free while still complementing the spices and fruit beautifully.
Can these mini cakes be made gluten-free?
Yes, by swapping self-raising flour for a gluten-free self-raising blend, you can ensure these cakes remain accessible without losing their delightful texture and rise.
How long should the cakes cool before decorating?
Cooling completely in the tin before removing is crucial, which typically takes about 30 minutes. Decorating warm cakes can cause the icing to melt and decorations to slip off.
What is the purpose of creaming the butter and sugar?
Creaming incorporates air into the batter creating a light, fluffy texture and helps the sugar dissolve, ensuring a smoother, tender cake crumb that’s a joy to bite into.
Final Thoughts
There’s something truly heartwarming about baking Mary Berry Mini Christmas Cakes to Delight Your Holiday Spirit Recipe. They’re not just delicious little cakes; they’re a celebration of tradition, cozy flavors, and joyful moments shared with loved ones. So why not gather your ingredients, turn on some festive tunes, and bake your own batch to fill your home with holiday magic? I promise these mini cakes will become a treasured favorite in your Christmas baking repertoire.
“`
Print
Mary Berry Mini Christmas Cakes to Delight Your Holiday Spirit Recipe
- Prep Time: 15 minutes
- Cook Time: 25 minutes
- Total Time: 40 minutes
- Yield: 12 mini Christmas cakes
- Category: Dessert
- Method: Baking
- Cuisine: British
Description
Mary Berry’s Mini Christmas Cakes offer a delightful festive treat perfect for holiday gatherings. These small, spiced fruit cakes are moist, tender, and infused with rich flavors from mixed dried fruits and brandy or orange juice, then topped with classic icing decorations to bring festive cheer.
Ingredients
Main Ingredients
- 175 g Butter (softened)
- 175 g Light Brown Soft Sugar
- 3 large Eggs (beaten)
- 175 g Self-Raising Flour
- 2 tsp Ground Mixed Spice
- 115 g Mixed Dried Fruit
- 2 tbsp Brandy or Orange Juice
Topping
- 115 g Icing Sugar
- 1–2 tbsp Warm Water
- Glacé Cherries (for decoration)
- Icing Holly Leaves (for decoration)
Instructions
- Preheat the oven: Set your oven to 160°C (320°F) and prepare a mini cake tin by lining it with parchment paper to prevent sticking.
- Cream butter and sugar: Beat the softened butter and light brown soft sugar together until the mixture is light and fluffy, which should take about 3-5 minutes.
- Add eggs: Gradually add the beaten eggs to the creamed butter and sugar, mixing well after each addition to ensure a smooth batter.
- Sift and fold dry ingredients: Sift together the self-raising flour and ground mixed spice, then gently fold this into the wet mixture to maintain a light texture.
- Incorporate fruit: Gently fold in the mixed dried fruit along with the brandy or orange juice to evenly distribute the flavors throughout the batter.
- Fill the tin and smooth: Spoon the batter into the prepared mini cake tin and smooth the tops with the back of a spoon for even baking.
- Bake the cakes: Place the tin in the oven and bake for 20-25 minutes, or until a toothpick inserted in the center comes out clean.
- Cool the cakes: Allow the cakes to cool completely in the tin before removing to keep them moist and intact.
- Prepare icing: Mix icing sugar with 1-2 tablespoons of warm water to form a thick but spreadable icing, and decorate the cooled cakes with icing, glacé cherries, and icing holly leaves for a festive finish.
Notes
- You can substitute brandy with orange juice for a non-alcoholic version.
- Ensure the butter is softened to room temperature for easier creaming with sugar.
- Be gentle when folding the flour mixture to keep the batter light and airy.
- Allow cakes to cool completely before icing to prevent melting or sliding of decorations.
- Store in an airtight container to maintain freshness, best consumed within a week.

